A musty smell, past water damage, or unexplained stains can make you wonder if mold is hiding inside your home. The problem is that mold does not always grow where you can see it. It may be behind drywall, beneath flooring, inside cabinets, or near plumbing lines.
A K9 mold inspection offers a fast and non-invasive way to narrow down suspicious areas. A trained mold detection dog uses its powerful sense of smell to alert the handler to possible mold growth. The inspection team can then examine those locations more closely and decide whether mold testing is needed.
Knowing what to expect can make the process feel much easier. Here is a simple step-by-step look at what happens during a K9 mold inspection.
Step 1: The Inspector Learns About the Property
The inspection usually begins with a conversation about the home or building. The mold inspector may ask about past leaks, floods, roof damage, plumbing repairs, musty odors, or areas where moisture has been found.
This information helps the inspection team understand where mold may be more likely to grow. However, the dog is not simply led to the areas that the homeowner suspects. The full property may still be checked so the inspection remains fair and complete.
You may be asked questions such as:
- Have there been any recent plumbing leaks?
- Has the roof ever allowed water inside?
- Do certain rooms smell musty?
- Has mold been cleaned or removed before?
- Are there stains, soft walls, or warped floors?
- Has the property had flooding or storm damage?
It is important to answer these questions as clearly as possible. Even a leak that happened months ago may still matter if building materials were not fully dried.
The inspector may also explain how the process works and what the detection dog will do. This gives you a chance to understand the inspection before the search begins.
Step 2: The Property Is Prepared for the Search
Before the dog begins working, the inspector may ask for a few simple changes inside the property. These steps help reduce distractions and give the dog space to work safely.
Pets may need to be placed in another room or outside. Strong scents, food, open trash containers, and cleaning chemicals may also need to be moved. The inspector may ask people to limit movement while the dog searches.
A clear path helps the team inspect important areas such as:
- Walls and baseboards
- Bathrooms and kitchens
- Cabinets and closets
- Flooring and carpet edges
- Utility rooms and laundry areas
- Windows and exterior doors
- Areas near plumbing fixtures
The home does not need to be perfect. However, removing clutter from walls, cabinets, and floors can make the inspection smoother.
The dog may wear a working vest or harness. Once the search begins, it is best to avoid calling, petting, feeding, or distracting the dog. The dog is focused on finding the odor it has been trained to recognize.
Step 3: The Mold Detection Dog Searches the Home
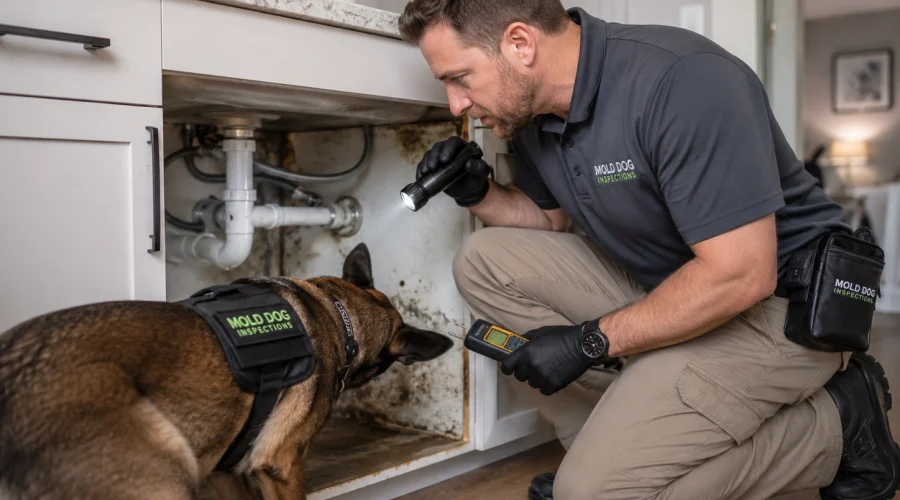
The trained dog and handler move through the property one area at a time. The dog uses its nose to search for the odor linked to mold growth.
Dogs have a much stronger sense of smell than humans. This allows a trained K9 to check areas that may be difficult to inspect using sight alone. The dog may sniff along walls, cabinets, floors, doors, air vents, and other building materials.
When the dog detects a target odor, it gives a trained response. This is known as an alert. The alert may involve sitting, stopping, pointing, or showing another behavior that the handler recognizes.
An alert does not always mean that a wall must be torn open. Instead, it gives the mold inspection experts a focused area to investigate. This can reduce random cutting, drilling, or damage to parts of the property that may not have a problem.
The handler watches the dog closely throughout the search. The dog and handler work as a team, and the handler records each alert location.
The search may move quickly through areas with no signs of concern. More time may be spent in places where the dog shows interest or where moisture damage is visible.
Step 4: Alert Areas Are Checked More Closely
After the K9 search, the mold inspector examines the alert areas using other inspection tools and methods. The goal is to understand why the dog responded in that location.
The inspector may look for signs of water damage, staining, soft building materials, condensation, plumbing leaks, or poor ventilation. Moisture meters or thermal imaging equipment may also be used when appropriate.
Possible next steps may include:
- Checking moisture levels in walls or floors
- Looking for active plumbing or roof leaks
- Inspecting nearby windows and doors
- Reviewing ventilation in bathrooms or attics
- Taking surface or air samples
- Recommending access to a concealed area
- Documenting the location for future repairs
This step is important because mold detection and mold testing serve different purposes. The K9 helps identify suspicious locations, while testing may help confirm what is present.
Not every inspection requires samples. The need for testing depends on the condition of the property, the reason for the inspection, and what the inspector finds.
A professional team should explain why a sample is recommended before taking one. This helps homeowners avoid paying for tests that may not add useful information.
Step 5: Mold Testing May Be Completed
When mold testing is needed, the inspector may collect an air sample, surface sample, or material sample. The type of sample depends on the location and the concern.
Air samples can help measure mold particles in the air at the time of testing. Surface samples may be collected from visible growth or a suspicious material. Material samples may involve a small piece of drywall, wood, or another building product.
Samples are usually sent to a qualified laboratory for analysis. The laboratory report may identify mold types and provide other information that supports the inspection findings.
Testing is not a replacement for finding the moisture source. Mold grows because moisture is present. Even when testing confirms mold, the leak, humidity problem, or water entry point must still be corrected.
A reliable mold inspector focuses on both questions: Where is the mold concern, and why is the area getting wet?
Step 6: You Receive Clear Findings and Next Steps
At the end of the inspection, the inspector reviews the areas where the dog alerted and explains any visible moisture or damage found during the walkthrough.
You may receive photos, notes, sample results, or a written report. The final information should help you understand which locations need attention and what actions may be necessary.
Recommendations may include repairing a leak, improving ventilation, drying wet materials, arranging professional remediation, or completing additional inspection work.
K9 Mold Dog Inspection provides independent findings and does not rely on selling mold removal services. This allows the team to focus on locating possible mold concerns and giving property owners clear information.
Schedule a K9 Mold Inspection With Confidence
A K9 mold inspection is designed to make hidden mold detection more focused and less invasive. The process combines a trained detection dog, an experienced handler, professional inspection methods, and mold testing when needed.
You do not have to guess which wall, floor, or cabinet may be hiding a problem. The K9 team can help narrow down suspicious areas before unnecessary demolition begins.
If your home has a musty smell, past water damage, returning stains, or an unexplained moisture problem, contact K9 Mold Dog Inspection. A professional inspection can give you clearer answers and help you decide what to do next.